· photography · 12 min read
Photographing Ice Caves in Iceland: A Guide's Camera Settings
The camera settings I use inside Vatnajökull's ice caves — aperture, ISO, shutter, white balance and focus — for tripod, handheld and phone shooters.

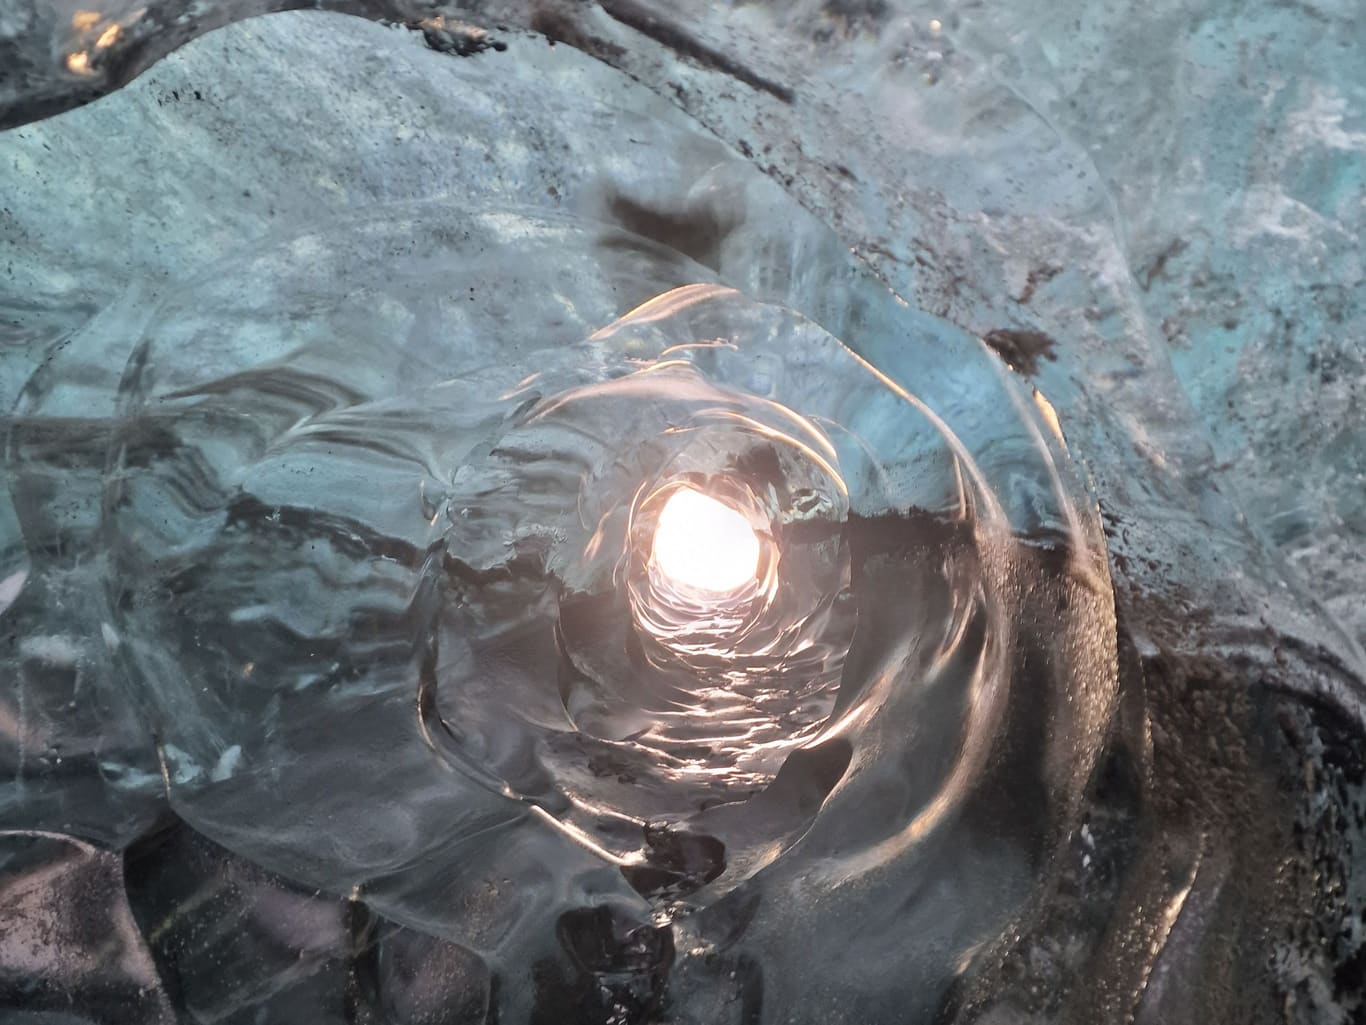
Inside a Vatnajökull ice cave, shoot RAW at f/5.6–f/8 with white balance set manually to 4500–5500 K, because auto white balance fights the blue. On a tripod, keep ISO at 200–400 and run the shutter from 1/4 s to 2 s; handheld, push ISO to 800–3200 and stay at 1/60 s or faster. If autofocus hunts on the smooth ice, switch to manual focus on a textured patch of wall. You get roughly 30–45 minutes inside the cave on the short tour — about 45–60 on Adventures Dream — so walk in with these already dialled in. Written by Sindri, who has guided ice cave tours on Vatnajökull since 2015.
I'm Sindri. My wife Fanney and I run Glacier Trips, a small family company in Höfn in South-East Iceland, and I've been driving guests from Jökulsárlón into the caves of Vatnajökull every winter since 2015. To be straight: I'm a guide who brings a camera to work, not a working photographer. But most of the photos on this site are mine, and the settings below are what winter after winter of guiding and shooting on Vatnajökull has settled into. It's what I tell guests in the parking area before we drive up.
| Setting | With tripod | Handheld |
|---|---|---|
| Mode | Manual (M) | Manual or Aperture Priority |
| Aperture | f/5.6–f/8 | f/5.6–f/8; f/2.8–f/4 for people |
| ISO | 200–400 | 800–3200 |
| Shutter | 1/4 s – 2 s | 1/60 s or faster |
| White balance | 4500–5500 K, set manually | 4500–5500 K, set manually |
| Focus | Single-point AF, or manual on ice texture | Single-point AF, or manual on ice texture |
| Format | RAW | RAW |
That's the cheat sheet; the rest is the why, and the mistakes that eat cave minutes.
What aperture works best inside an ice cave?
f/5.6 to f/8 for the classic scenic frame. A cave has more depth than the photos suggest, texture at your feet and a curved ceiling a few metres above, and f/5.6–f/8 holds both sharp on a wide lens. Open to f/2.8–f/4 only when a person is the subject and you want the ice soft behind them.
Past f/11, diffraction starts to smudge the fine grain in the ice — and that grain is half the picture.
What ISO should you use in an ice cave?
As low as the shutter allows: 200–400 on a tripod, 800–3200 handheld. The cleanest blues come from base-ISO long exposures — at ISO 200 and f/8, expect shutters toward the top of the 1/4 s to 2 s range — and past it in the darkest chambers. That's tripod territory.
Handheld, don't be precious. Full-frame bodies stay clean to about ISO 6400 and APS-C to about 3200, and a sharp frame at ISO 3200 beats a blurred one at 800 every time.
Do you need a tripod, and what shutter speeds work?
You don't need one, but for the deep blues a tripod is the single biggest upgrade you can bring. Cave light is dimmer than an overcast day outside, and exposures of 1/4 s to 2 s at ISO 200–400 pull out colour depth you can't hold handheld. Without one, treat 1/60 s as your floor, use stabilisation, and brace the camera against an ice wall.
Tripods are welcome on both of our tours; the honest difference is pace. On the short tour the group moves together, so plan for a couple of deliberate setup moments rather than working every angle; Adventures Dream, with eight guests at most, gives you more room. Which tour suits camera work is covered in our guide to choosing an ice cave tour for photography.

What white balance keeps the ice blue?
4500–5500 K, set manually. Auto white balance sees all that blue and corrects toward neutral — exactly backwards: the blue is the point. 4500–5000 K holds the cool tone, the 5500 K daylight preset warms a cave that leans too cyan, and the tungsten preset overcools an already blue cave into cyan — leave it alone.
RAW makes white balance recoverable later, but starting close lets you judge real exposure on the back screen instead of guessing through a colour cast.
Why does autofocus struggle inside ice caves?
Because autofocus needs contrast, and smooth, dim ice offers little. Three fixes, in the order I'd try them:
- Single-point AF on a hard edge — an ice column, a person, a seam in the wall — then switch the lens to manual to lock it.
- Manual focus on texture: find a patch of crystalline detail and focus by eye.
- Focus magnification in live view, if your camera offers it: punch in on the screen, nail the focus, punch out, shoot.
At f/8 on a wide lens, focusing a third of the way into the scene covers the rest.
Which lenses are worth carrying into the cave?
A wide-angle zoom does most of the work; if you carry one lens, make it that.
- Wide (16–24 mm full-frame equivalent): the workhorse for scale and the vaulted-ceiling shots.
- Ultra-wide (12–14 mm): dramatic, with edge distortion to watch.
- Standard zoom (24–70 mm): ice detail, and portraits with the cave behind.
- Telephoto (70–200 mm): rarely useful inside; save it for the glacier and the lagoon.
- Phone: genuinely fine — recent flagships with night mode handle the dim blue light better than most people expect. For many guests it's the right camera for this trip.
How do you expose for blue ice?
Expose for the mid-blue ice and let the bright entrance go where it wants. Dynamic range near a cave mouth is brutal — daylight at the opening, deep shadow a few steps in — and a whole-scene meter reading blows the entrance or drowns the interior. Slight underexposure protects the highlights and leaves shadows recoverable in RAW.
- Trust the histogram — the back screen lies about brightness in cold, dim conditions.
- Bracket ±1 stop when unsure. Blown highlights don't come back.
- Watch the blue channel: the deepest blues can clip before red or green, so check the RGB histogram, not just luminance.
One seasonal note: October ice is generally less blue; from December onwards the colour is deepest. The best month to visit an ice cave weighs the trade-offs, and how ice caves form explains where the colour comes from. For everything that isn't camera work, there's our guide to ice caves in Iceland.

How should you process ice cave photos?
Gently. The cave gives you the colour; your job in Lightroom or Capture One is not to break it.
- Temperature: nudge cooler, toward 4500–4800 K, for the blue you actually saw.
- Tint: a small magenta push offsets a green-blue cast.
- Shadows and blacks: lift carefully. The sense of depth lives in the shadows.
- Texture and clarity: small positive amounts bring up the crystal detail.
- Saturation: restraint — oversaturated ice reads as fake, and the cave doesn't need the help.
What does the cold do to your camera?
It shortens everything: battery life, and the window before your fingers stop cooperating. The practical list:
- Carry two or three batteries and keep the spares in an inside pocket. Cold drains them startlingly fast; a cold battery partly recovers as it warms.
- Condensation hits on the way out. Going from cave-cold into a warm car fogs glass; let gear warm gradually, ideally zipped in a bag.
- Spikes help your boots, not your tripod. Set the feet firmly into compact ice, or on rock where there is any — a skating leg is how cameras die.
- Tell the guide what you're after. Say early that you're hoping for a couple of long exposures; our guides keep the group together, but they'll usually find you a moment for one more frame.
- Wear gloves you can shoot in. Thin liners under warm gloves beat bare fingers on cold metal; what to wear on an ice cave tour covers the rest.
And carry the time framing in: roughly 30–45 minutes inside the cave on the short tour, about 45–60 on Adventures Dream — how long you spend inside an ice cave explains what moves it. Plenty of frames if your settings are close walking in; not enough to relearn your menus by headlamp.
Booking a guided ice cave tour
Both tours meet at the main parking area by Jökulsárlón Glacier Lagoon, where a parking fee applies. We don't do pickups, so nearly everyone drives. For camera work the choice is mostly elbow room: the short tour suits phone and handheld shooters; Adventures Dream's smaller group gives tripod photographers more space, plus glacier surface time. Cave time runs roughly 30–45 minutes on the short tour, about 45–60 on Adventures Dream.
- Ice Cave Inside Vatnajökull — 2.5–3 hours, maximum 14 guests, minimum age 8, 23,900 ISK. Includes a local guide, Super Jeep transport from Jökulsárlón to the glacier and back, micro spikes when needed, helmet, and headlamps if needed. Arrive 20 minutes before departure.
- Ice Cave Adventures Dream — 5–6 hours, maximum 8 guests, minimum age 14, 36,900 ISK. Adds a guided glacier hike, crampons, a harness when the route needs one, and an ice axe when needed. Arrive 30 minutes before departure.
Our 2026–27 season runs from 1 October 2026 to April 2027. Cancellation is free up to 48 hours before departure with a full refund; inside 48 hours there's no refund; and if we cancel for weather or safety, you choose between a full refund and a free reschedule. The base price is the same on the booking platforms, so book direct and use DIRECT5 for 5% off. Gear and season questions are mostly in the tour FAQ; the rest, tripod questions included, goes to info@glaciertrips.is or +354 779 2919. We hold 4.9 stars across 580+ TripAdvisor reviews.
Frequently asked questions about ice cave photography in Iceland
What camera settings work best for Iceland ice cave photography?
Manual mode, f/5.6–f/8, white balance set manually to 4500–5500 K, and RAW. On a tripod: ISO 200–400 with shutters of 1/4 s to 2 s. Handheld: ISO 800–3200 at 1/60 s or faster. Switch to manual focus if autofocus hunts on the smooth ice.
Do I need a tripod for ice cave photography?
For the deepest blues, yes — long exposures at low ISO deliver colour handheld shooting can't. Tripods are welcome on both Glacier Trips tours: expect a couple of setup moments in the short tour's shared pace, and more room on Adventures Dream's group of at most eight.
How long do you get to photograph inside the cave?
Roughly 30–45 minutes on the short tour and about 45–60 on Adventures Dream, on a settled day — plus the longer tour's glacier surface time. Arrive with aperture, ISO and white balance already set so the minutes go into frames, not menus.
What's the best lens for an ice cave tour?
A wide-angle zoom, 16–24 mm full-frame equivalent, handles the scale and the ceiling shots. A 24–70 mm covers ice detail and portraits. Ultra-wides are dramatic but distort at the edges; a telephoto is rarely useful inside the cave.
Can I get good ice cave photos with just my phone?
Yes. Recent flagships with night mode handle the dim blue light well, and HDR processing copes with bright entrances better than many dedicated cameras. Brace the phone against an ice wall for longer exposures.
How do I get the blue colour in ice cave photos?
Set white balance manually to 4500–5000 K — auto white balance tries to neutralise the blue. In post, nudge the temperature slightly cooler, lift shadows carefully and resist heavy saturation: the ice is already blue.
— Sindri
Glacier Trips · Höfn, Iceland · A local family company since 2015